This article walks you through setting up 5G cellular connectivity on your Parrot ANAFI UKR GOV aircraft using the DroneSense Blue application — from choosing the right SIM card to configuring your link priority settings.
Supported Carriers and SIM Card Types
The ANAFI UKR GOV accepts SIM cards from cellular telephone providers. However, the required SIM card type depends on your carrier:
| Carrier | Required SIM Type | Notes |
|---|---|---|
| T-Mobile | Data Only | Data-only SIM cards work as expected. |
| AT&T | Phone (Voice) Plan | Data-only cards will not work. You must use a standard phone plan SIM. Note: Testing has been conducted on AT&T FirstNet, not standard AT&T consumer plans. |
| Verizon | Phone (Voice) Plan | Verizon compatibility has not yet been tested. Functionality is expected but not confirmed. |
⚠️ Your SIM card must be activated with your carrier before you insert it into the aircraft or tablet. An unactivated SIM will not connect.
Where to Install the SIM Cards
The Parrot ANAFI UKR GOV system has two SIM card slots:
Aircraft — The SIM card port is located onboard the aircraft body. This SIM provides direct cellular connectivity to the drone for telemetry and video streaming. The ANAFI UKR SIM card and microSD card slots are located on the left-hand side of the drone behind the SIM - SD card cover.
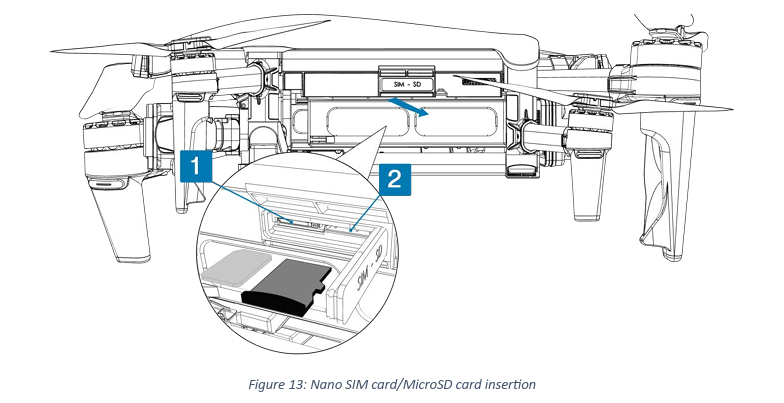
To install a SIM card/microSD card:
1. Open the SIM - SD card cover to expose the SIM card/microSD card slots.
a. Insert the SIM card into the left-hand keyed slot (No. 1 in Figure 13).
b. Insert the microSD card into the right-hand keyed slot (No. 2 in Figure 13).
The card slots make a slight click when the cards are properly inserted.
IMPORTANT:
- For the SIM card: the metal contacts must face the bottom of the drone, and the cutout must face the drone.
- For the microSD card: the metal contacts must face the bottom of the drone.
2. Close the SIM - SD card cover.
Controller Tablet — The SIM card port is located in the tablet integrated into the controller. This SIM provides internet connectivity for the DroneSense Blue application on the controller.
💡 DroneSense Recommendation: We recommend installing SIM cards in BOTH the aircraft and the controller tablet for the most reliable connectivity experience. However, a SIM card in the tablet is not required if the tablet already has an internet connection through another means (e.g., Wi-Fi or mobile hotspot). A SIM card in the aircraft is always required.
Setting Up Your SIM Cards
- Obtain the correct SIM card type for your carrier (Data Only for T-Mobile; Phone plan for AT&T or Verizon).
- Contact your carrier to activate the SIM card(s). Make sure activation is confirmed before moving on.
- Insert the activated SIM card into the aircraft's SIM card port.
- (Optional) Insert a second activated SIM card into the controller tablet's SIM card port.
- Power on the aircraft and controller.
Accessing Cellular Settings in DroneSense Blue
Once the activated SIM card is installed in the aircraft and you have logged into the DroneSense Blue application and selected your mission, the Cellular Settings Menu can be accessed through two methods:
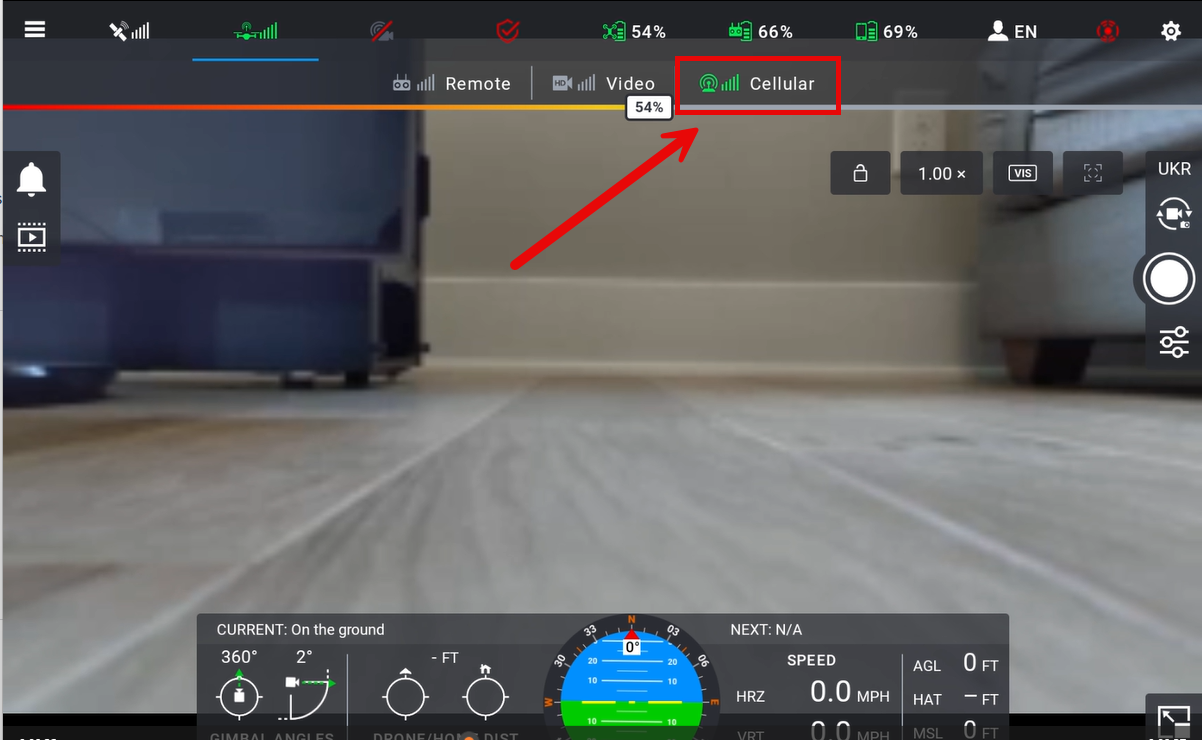
Method 1: Aircraft Health Bar Navigate to the Aircraft Connectivity display on the aircraft health bar. Use the drop-down menu to open the Cellular Settings Menu.
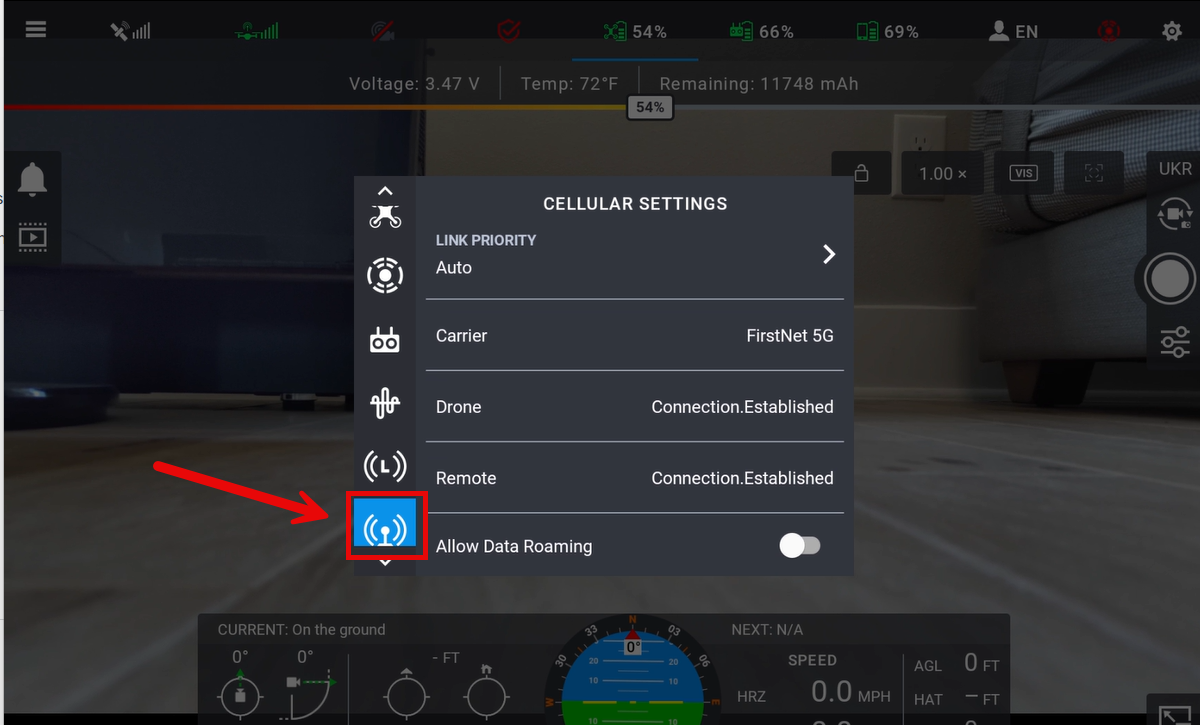
Method 2: Aircraft Settings Cog Wheel Tap the Aircraft Settings cog wheel icon to open the settings panel, then select the Cellular Settings option to open the Cellular Settings Menu.
Cellular Settings Menu Configuration
The Cellular Settings Menu provides several configuration options and status indicators for managing your 5G connectivity during operations.
Link Priority
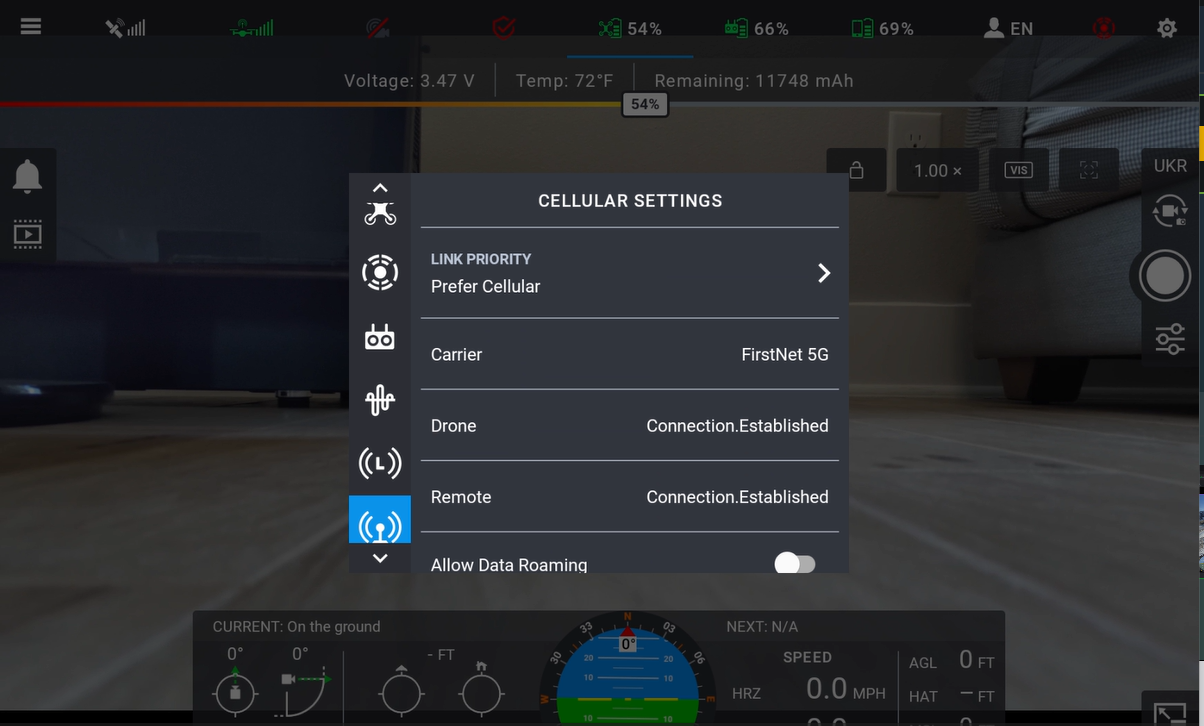
The Link Priority setting determines how the aircraft manages communication between the cellular network and the direct radio link to the controller. Three options are available:
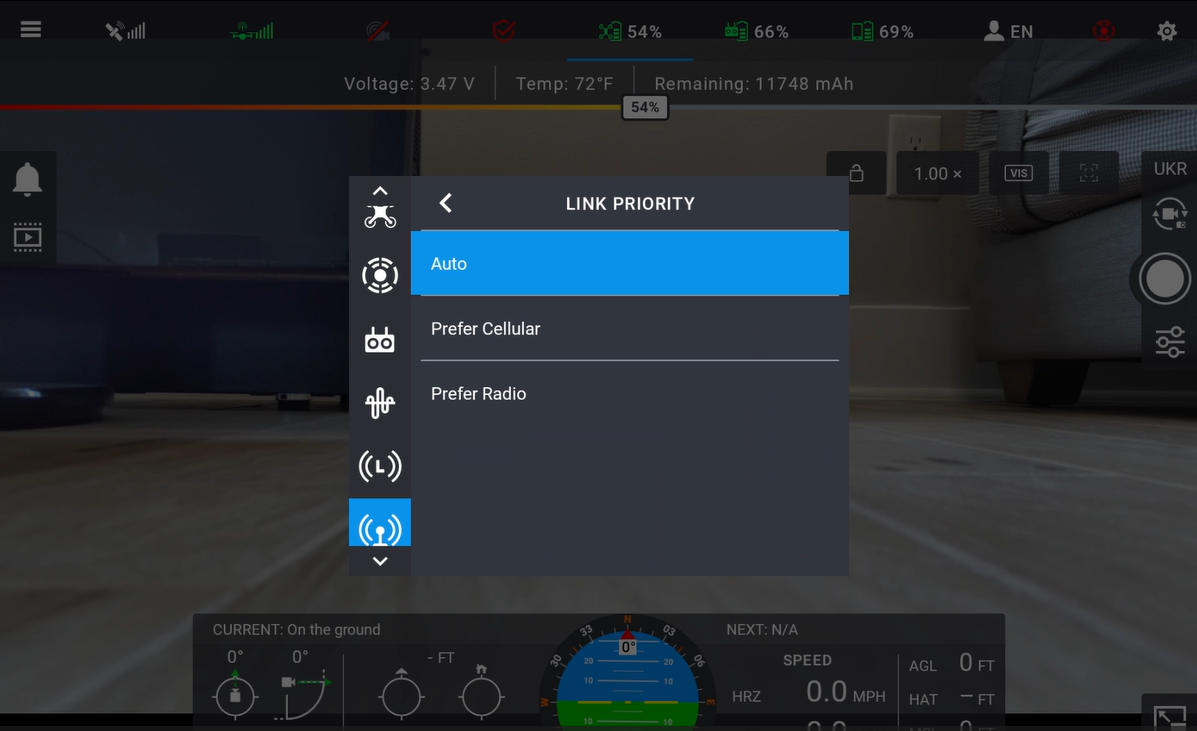
Auto — The system automatically selects the best available connection based on signal strength and quality. The aircraft will dynamically switch between cellular and radio as conditions change. This is the recommended setting for most operations.
Prefer Cellular — The system prioritizes the 5G cellular connection for all communications. The radio link serves as a fallback if cellular connectivity is lost. Best suited for operations in areas with strong cellular coverage where extended range is needed.
Prefer Radio — The system prioritizes the direct radio link between the controller and the aircraft. Cellular serves as a fallback if the radio link degrades. Best suited for close-range operations or areas with limited cellular coverage.
Connection Status Indicators
The Cellular Settings Menu displays the following status information:
- Cellular Carrier — Displays the name of the cellular carrier the SIM card is connected to (e.g., T-Mobile, AT&T, Verizon).
- Drone Connection Status — Shows the current cellular connection status for the aircraft.
- Remote Connection Status — Shows the current cellular connection status for the controller/remote.
Data Roaming
The Cellular Settings Menu includes a toggle to allow or disallow data roaming. When enabled, the aircraft and controller may connect to partner carrier networks when outside of the primary carrier's coverage area. Agencies should consult their cellular plan terms before enabling data roaming, as additional charges may apply.
Comments
0 comments
Please sign in to leave a comment.